はじめに
こんにちは、Engineer Campインターン中の山本です。
ブログへの投稿は2本目になります。1本目はGoLandについての記事を投稿いたしました。
今回はGoogle Chat APIに関しての記事です。
背景
業務でGoogle Chat上で通知システムを作成する必要があったのですが、実装するにあたりいくつかのハードルがありました。
- 公式の実装例にGoがないため、すぐに使えない
- GSuiteアカウントがないと試せないからか、参考になる記事が少ない
以上を踏まえて、この記事では以下の事柄について説明していきます。
- Webhookを使用しGoでメッセージを送信する方法
- 投稿を1つのスレッドにまとめる方法
- カード型メッセージの送信方法
Google Chat API とは
具体的な説明の前に、Google Chat API について軽く説明いたします。
Google Chat API とは、Google Chat で Bot を通じて機能の実装、拡張を支援する API です。
Google Hangoutsとの関連は以下のようになっています(Wikipediaより引用)
2020年4月、ビデオ会議機能を「Google Meet」、チャット機能を「Google Chat」としてそれぞれ分離。残されたテキストメッセージ機能については、2020年後半を目処にGoogle Chatに統合し、ハングアウトは廃止される予定である。
ユースケースとしては、
- データのリソースなどから検索した情報を返す
- ユーザが特定のタスクを実行するのを助ける
- イベントの更新、変更、繰り返しなどの通知を送る
などがあります。
今回はその中から、非同期メッセージの送信機能を持つIncoming Webhookを使用し、Goでメッセージを送信するアプリケーションの実装を行います。
1. Google ChatでWebhookの設定をする
それでは始めていきます。
コードを書く前に、Google ChatにてWebhookの設定をする必要があります。
手順は以下のとおりです。
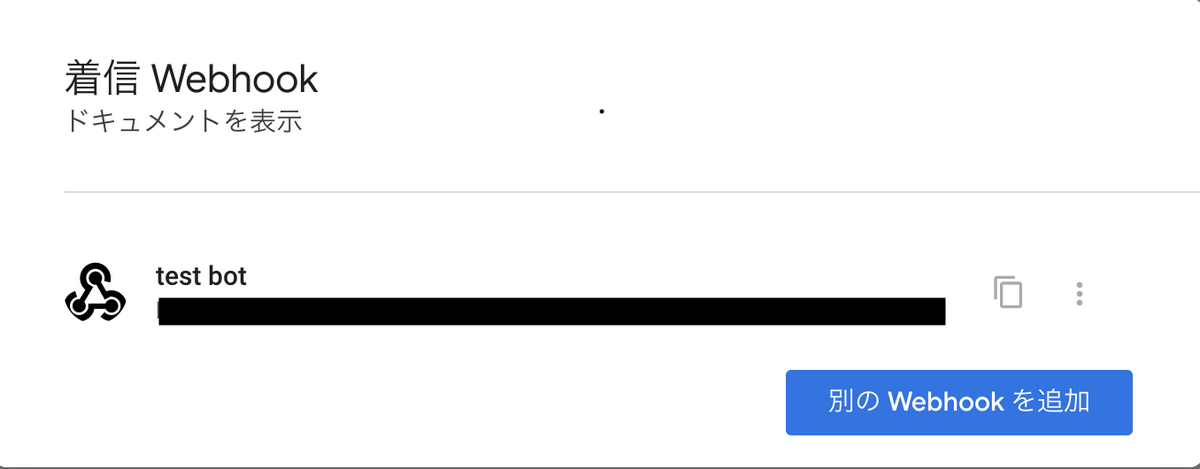
Google Chatを開いて、チャットルームを作成します。スレッド返信を使用する場合はチェックを入れます。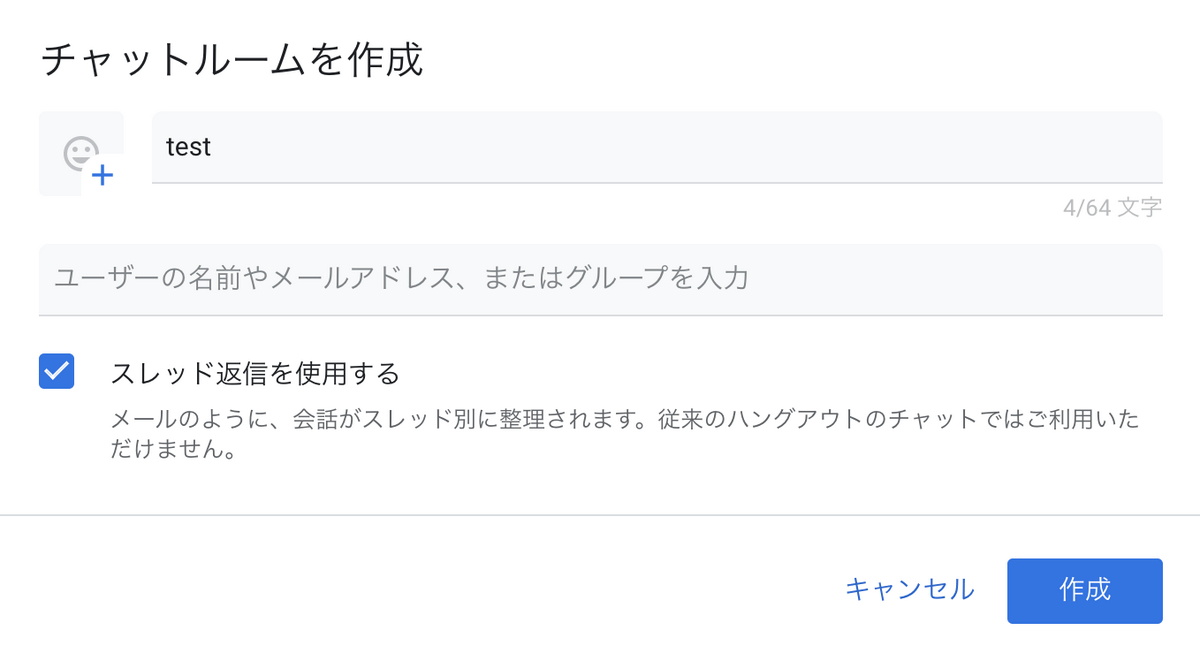
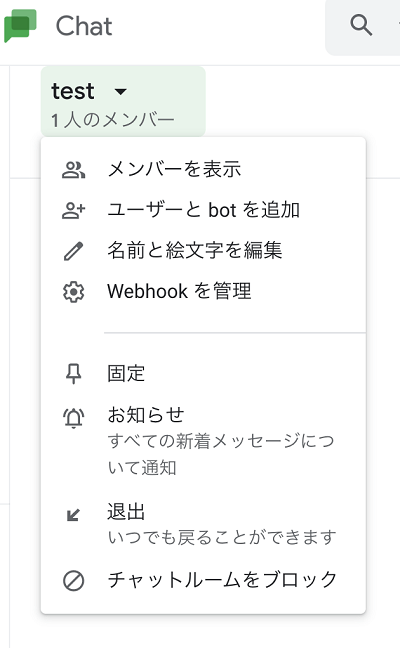
左上をクリックして「Webhookを管理」を選びます。
Webhookの名前とアバターURLを入力し、保存を押します。
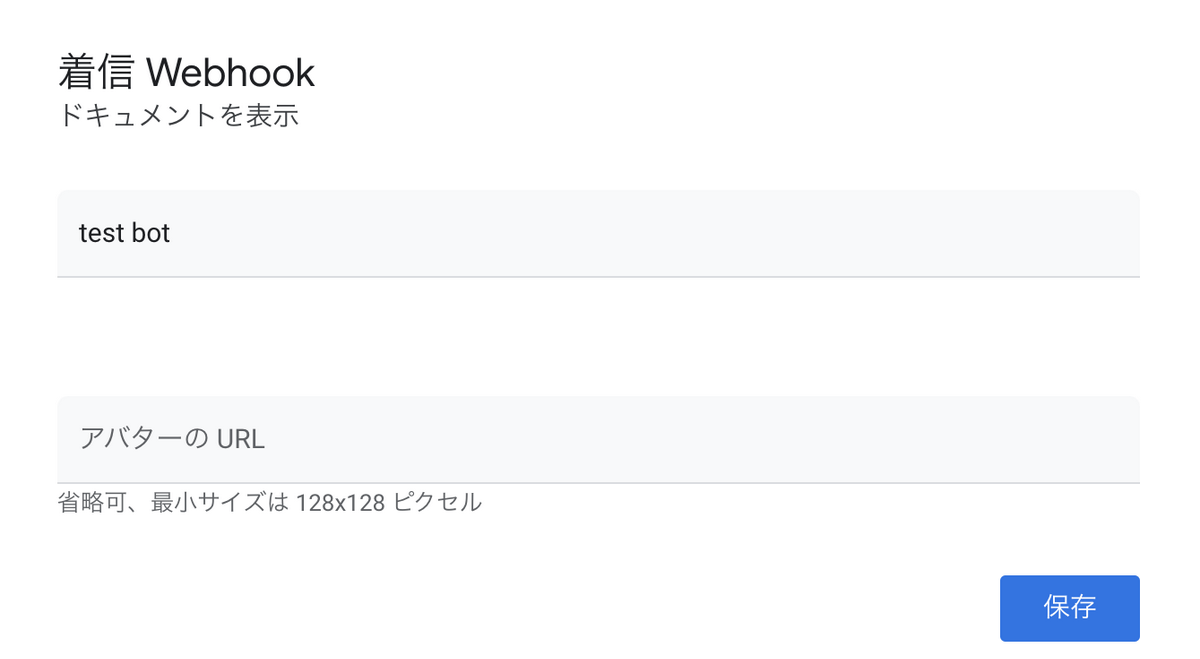
以上でWebhookの設定は終わりです。この時払い出されるURLは後で使用します。
2. Goでメッセージを送る
Webhookの設定は完了したので、次にGoアプリケーションの実装について説明します。
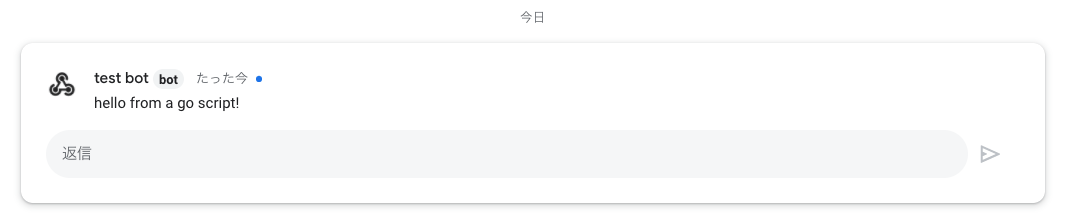
以下はWebhookで簡単なメッセージを送信するGoのプログラムです。
package main |
プログラムを実行すると、Google Chatにメッセージが送信されます。
(付録1)投稿を一つのスレッドにまとめる
投稿に対して返信をしない場合など、スレッドをいちいち作成する必要がないケースについては、同一スレッドにメッセージを投稿した方が見た目がスッキリする場合もあります。
Webhook URLにスレッドに関するクエリパラメータを追加することで投稿するスレッドを1つに指定できます(参照)
const webhook = "<任意のWebhookURL>&threadKey=<適当な文字列>" |
以下のように、同じスレッドにメッセージが投稿されるようになります。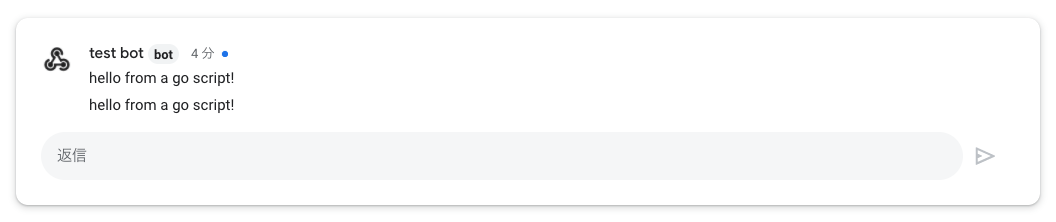
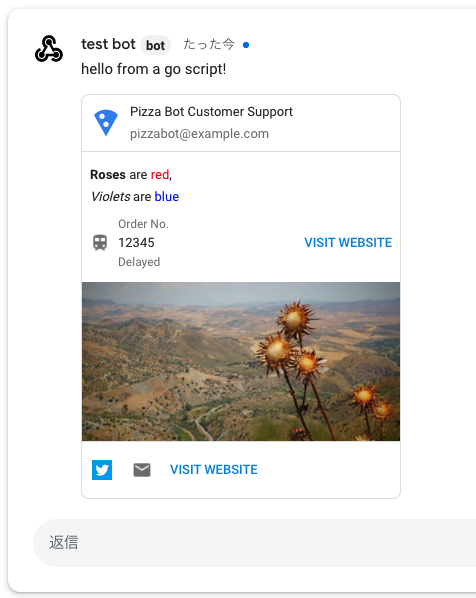
(付録2)Card型メッセージ
シンプルなメッセージでは表現しきれない場合の手段としてカード型のメッセージが用意されています。
以下は公式ドキュメントで紹介されていた表現をほとんど網羅したカード型のメッセージを送信するプログラムです。
package main |
長々とコードが書かれていますが、シンプルなメッセージで紹介したプログラムと行っていることは変わらず、json.MarshalしたときにGoogle Chatが求めている形になるようにGoの構造体に値を詰めて渡しています。
それぞれの要素の関係をわかりやすく図にすると以下のようになります(厳密には異なります)
Cardの中には1つ以上のSectionが、Sectionの中には1つ以上のウィジェットが必要になります。ウィジェットの中にはTextParagraphやKeyValue、Buttonの配列などの中から1つの要素が入ります。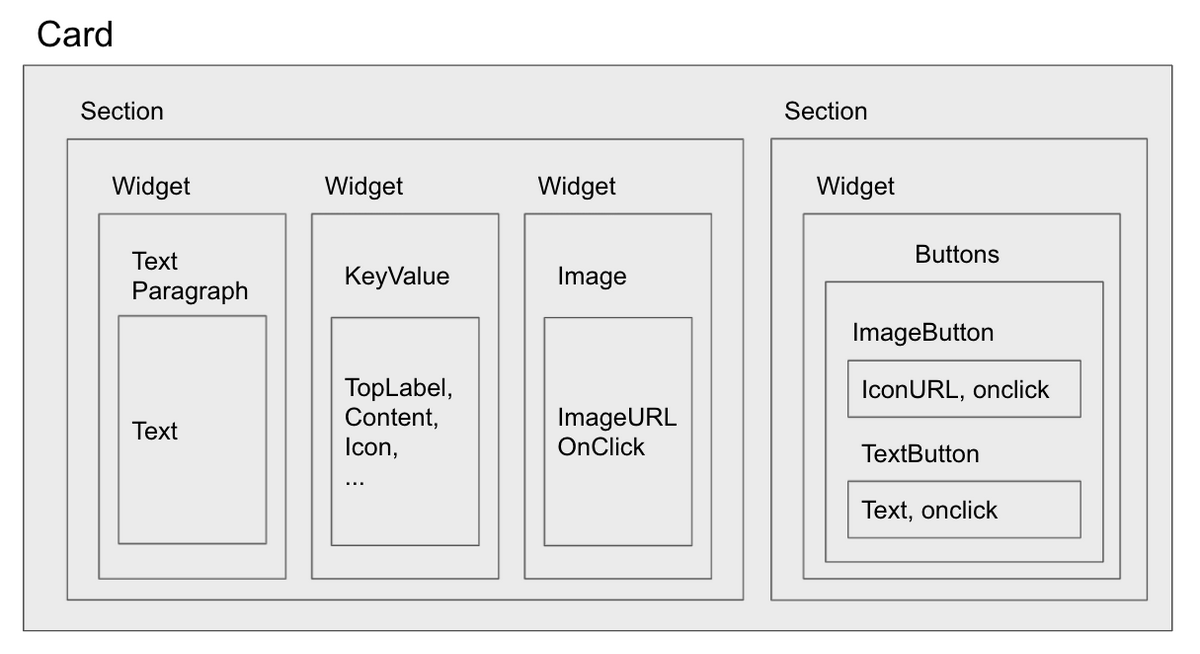
出力結果がこちらです。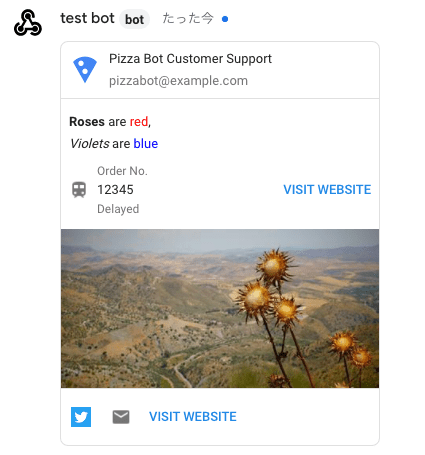
実際に使ってみた感想
今回はIncoming Webhookを使用して一方的な通知メッセージを送信する、といった用途に使用しました。
慣れれば、Webhookの設定 → コード書いてメッセージを投げるまでがスピーディにできるため、簡単な機能を載せたボットを使いたい場合などにはお勧めできると思います。