はじめに
Terraform連載の7リソース目です。
こんにちは。TIG DX チームのゆるふわエンジニアの前原です。
今までは、GitLab でTerraform を利用する機会が多かったのですが、今回は、GitHub Actions を利用することになりました。
そこで実施した内容をこの記事に書いていきたいと思います。
GitHub Actions の設定
GitHub Actions などを利用してAWS リソースを操作する場合にクレデンシャルを利用してきた方が多いのではないでしょうか。
クレデンシャル利用は便利ですが、何かとリスクを抱えています。
そこで一時的なトークンを受け取りGitHub Actions を実行する環境を作りたいと思います。
OIDC プロバイダの設定
OIDC プロバイダの追加をTerraform で行います。
- プロバイダタイプ: OpenID Connect
- プロバイダ URL: https://token.actions.githubusercontent.com
- 対象者: sts.amazonaws.com
参考: Configuring OpenID Connect in Amazon Web Services
data "http" "github_actions_openid_configuration" { url = "https://token.actions.githubusercontent.com/.well-known/openid-configuration" } data "tls_certificate" "github_actions" { url = jsondecode(data.http.github_actions_openid_configuration.body).jwks_uri } resource "aws_iam_openid_connect_provider" "github_actions" { url = "https://token.actions.githubusercontent.com" client_id_list = ["sts.amazonaws.com"] thumbprint_list = [data.tls_certificate.github_actions.certificates[0].sha1_fingerprint] } |
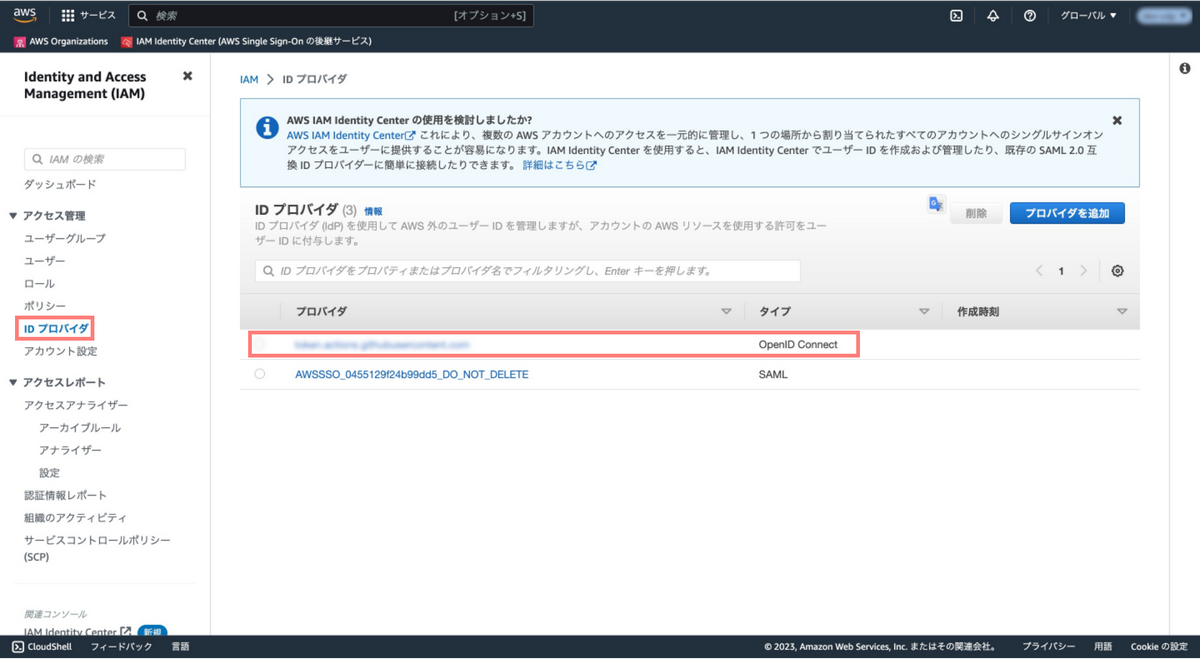
Terraform 実行後、IAM コンソールにアクセスします。
ID プロバイダ設定をクリックし、追加されていることを確認します。
IAM Role 追加
次にGitHub Actions に割り当てるIAM Role を作成します。
ここではサンプル的に作成しておりますので、管理者権限を付与しています。
実際には、運用に合わせてポリシの設定をして頂ければと思います。
module "iam_role_github_actions" { source = "{任意の場所指定}/modules/github_actions" project_name = local.project_name account_id = data.aws_caller_identity.current.account_id github_org = local.github_org github_repo = local.github_repo } |
variable "project_name" {} variable "account_id" {} variable "github_org" {} variable "github_repo" {} resource "aws_iam_role" "github_actions" { name = "${terraform.workspace}-${var.project_name}-github-actions" assume_role_policy = templatefile("{任意の場所指定}/assume_role.json", { account_id = var.account_id, github_org = var.github_org, github_repo = var.github_repo } ) } resource "aws_iam_policy" "github_actions" { name = "${terraform.workspace}-${var.project_name}-github-actions" policy = templatefile("{任意の場所指定}/administrator.json", {}) } resource "aws_iam_role_policy_attachment" "github_actions" { role = aws_iam_role.github_actions.name policy_arn = aws_iam_policy.github_actions.arn } |
{
  "Version": "2012-10-17",
  "Statement": [
    {
      "Effect": "Allow",
      "Principal": {
        "Federated": "arn:aws:iam::${account_id}:oidc-provider/token.actions.githubusercontent.com"
      },
      "Action": "sts:AssumeRoleWithWebIdentity",
      "Condition": {
        "StringLike": {
          "token.actions.githubusercontent.com:sub": "repo:${github_org}/${github_repo}:*"
        }
      }
    }
  ]
} |
{
  "Version": "2012-10-17",
  "Statement": [
      {
          "Effect": "Allow",
          "Action": "*",
          "Resource": "*"
      }
  ]
} |
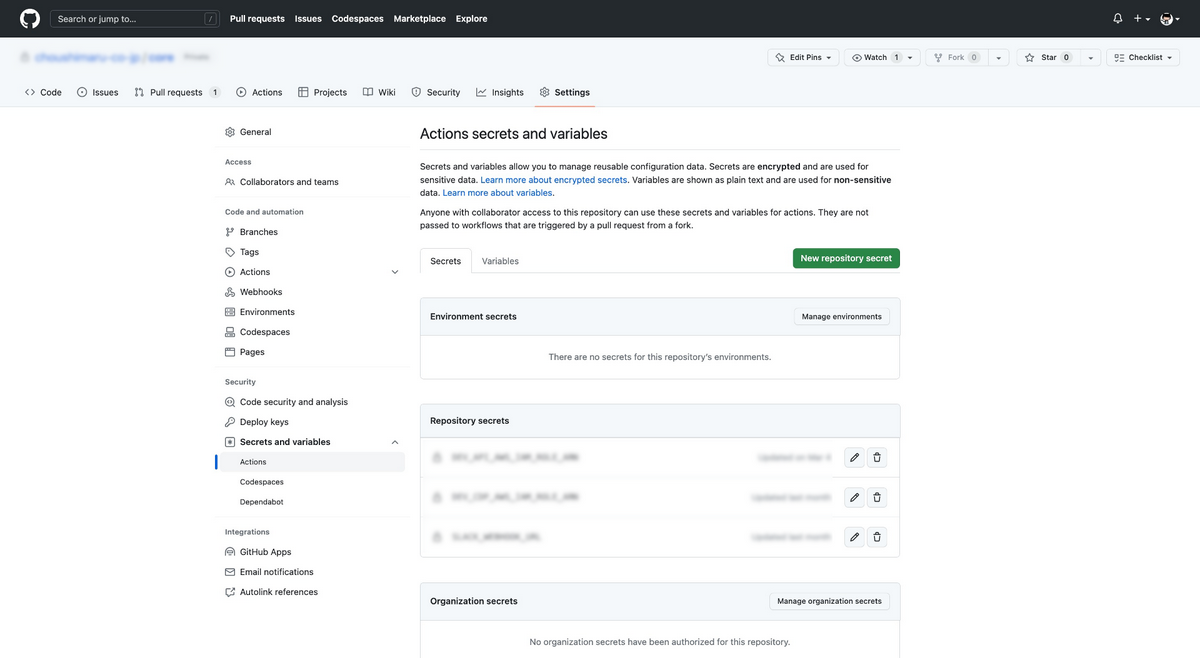
シークレット変数の設定
GitHub の[Settings] > [Secrets and variables]からシークレット変数を設定します。
- Name: AWS_IAM_ROLE_ARN
- Secret: {IAM_ROLE_ARN}
これで設定が完了です。
Terraform 実行用のワークフロー
ここでは実際にワークフローを作成していきます。
以下のディレクトリ構成とします。
terraform |
以下にサンプルコードを記載します。
name: workflow terraform |
上記のワークフローは、Terraform validate, init, plan までを実行するワークフローです。
push: |
Push 時にterraform/*でファイルの変更があった際にワークフローが実行されます。
strategy: |
workdirは、実行したいディレクトリを指定します。
- uses: aws-actions/configure-aws-credentials@v1 |
aws-actions/configure-aws-credentialsを利用し、クレデンシャルを取得します。
先ほど設定したシークレット変数をsecrets.AWS_IAM_ROLE_ARNで取得します。
- name: terraform setup |
Terraform を実行する際には、setup-terraformを利用することで容易に実行できます。
ここでは、Terraform の実行内容を簡略化して記載しています。
ワークフロー手動実行
Terraform applyを自動実行するのは怖いと思う方はいると思います。
そこで、手動で実行するための方法を記載したいと思います。
on: |
手動実行する際は、workflow_dispatchを利用します。
Input タイプは、string、choice、boolean、environment などが存在します。
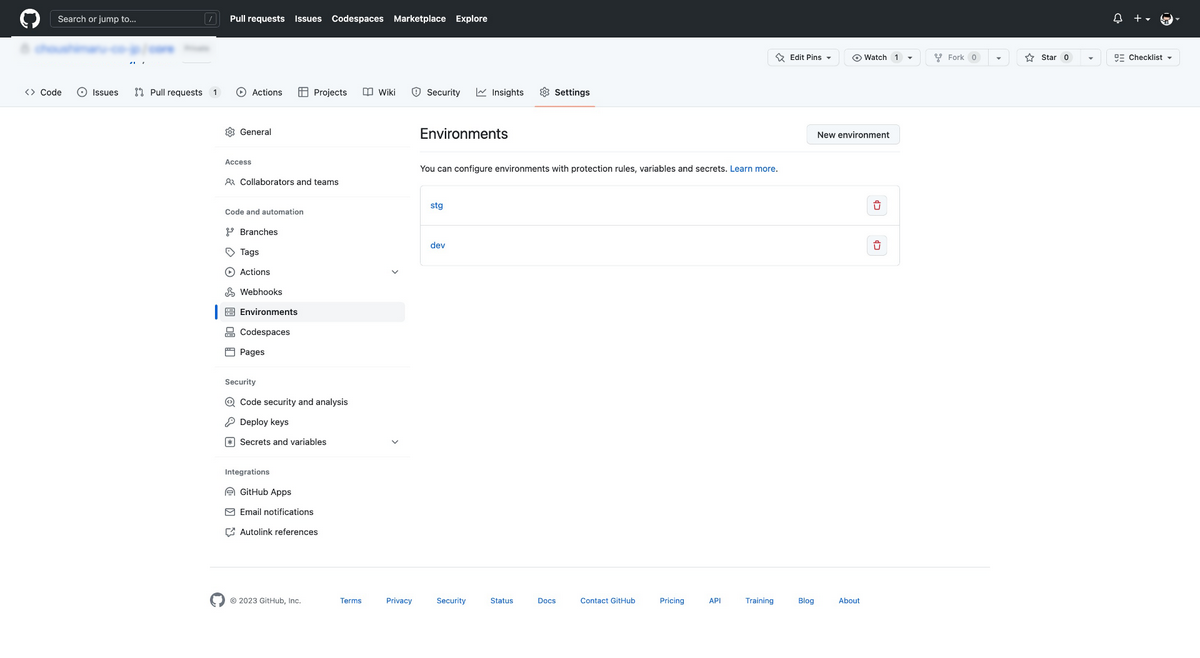
ワークフローを手動実行する際にenvを指定したい場合は、environmentを利用します。
利用する際は、事前に[Settings] > [Environments]で設定を行います。
注意点として手動実行は、デフォルトブランチでのみ実行可能です。
ただし、CLI を利用することでデフォルトブランチ以外でも実行が可能です。
network: |
タイプをbooleanとすることでチェックボックスで実行するジョブを選択できます。
main: |
if: inputs.main == trueで手動実行時にチェックを入れた場合は、実行するという条件にしています。
また、needs: networkとすることで、networkジョブが実行されていないとスキップする条件としています。
この設定をする理由は、networkディレクトリ内のリソースを作成しないとmainディレクトリ内のリソースを作成できないと言った依存関係が発生している場合に利用するケースです。
おわりに
GitHub Actions を利用することでTerraform の実行環境を容易に作成できるかと思います。
また、ここで説明した内容以外にもたくさんの方法があるので色々試して頂ければ幸いです。
ありがとうございました!